(1)")


Vanlife has become more popular than ever. But living on the road comes with its own specific challenges. To be able to call your van home, you must make the space as comfortable as possible. One often overlooked aspect during van conversions is sound deadening, which is a shame since it can significantly enhance your quality of life on the road.
This guide will explore why sound deadening is essential, the different methods and materials you can use, and step-by-step instructions on soundproofing your van.
How Sound Works
Before we get into the importance of sound deadening your van, let’s first take a moment to look at the basics of sound; sound is a type of energy that moves in waves through different substances, like air, water, or even solid objects.
When something vibrates, like a guitar string or the engine of your van, it creates these waves that travel through the air and eventually reach our ears, where we hear them as sound.
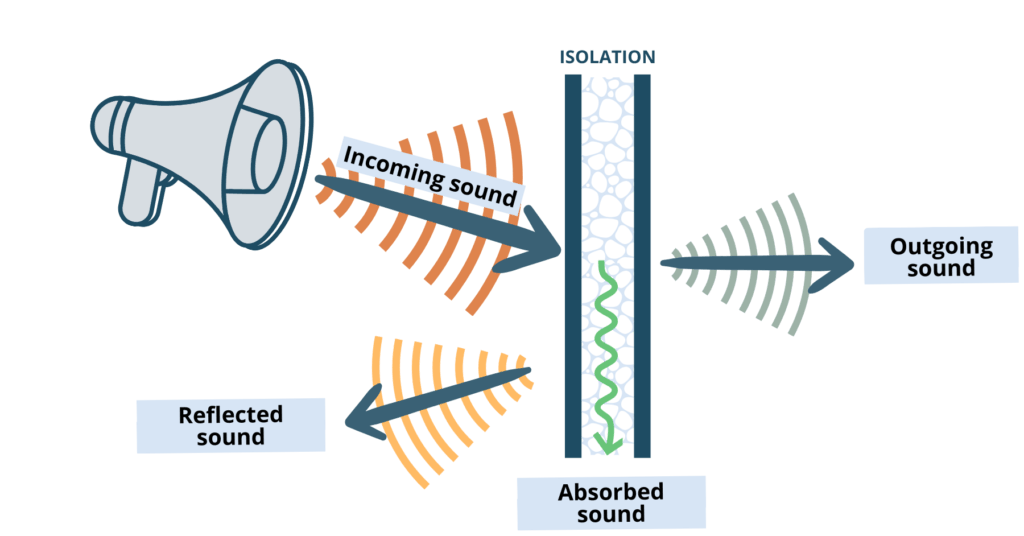
Now for the interesting part; sound waves can either be reflected, absorbed, or transmitted depending on the materials they encounter. For example, when a sound wave hits a hard surface, like the metal bodywork of your van, it bounces off and can create echoes or reverberations, causing noise pollution.
But when it hits a soft surface, like the fabric on the interior of your van, it gets absorbed, which helps to reduce the overall noise level. That’s why soundproofing materials usually consist of soft, absorbent materials that can help to make your van quieter and more comfortable.
Why Sound Deadening Matters
A day on the road isn’t complete without that awesome road trip playlist you spent hours accumulating. It would be a shame if you did not hear a single song from it, right? Don’t worry; we will ensure you can vibe to your sweet tunes. That’s where sound deadening comes in.
Sound deadening your van isn’t just important when you’re driving. Especially when you are living in your van for extended periods, you want it to be a peaceful place you can come home to.
If you are working remotely, a silent environment where you can concentrate during work, chill out after hours, or recharge your batteries is essential. Never lose a good night’s sleep due to noise again; keep reading to learn how to make your van soundproof.

Methods & Materials
Insulation
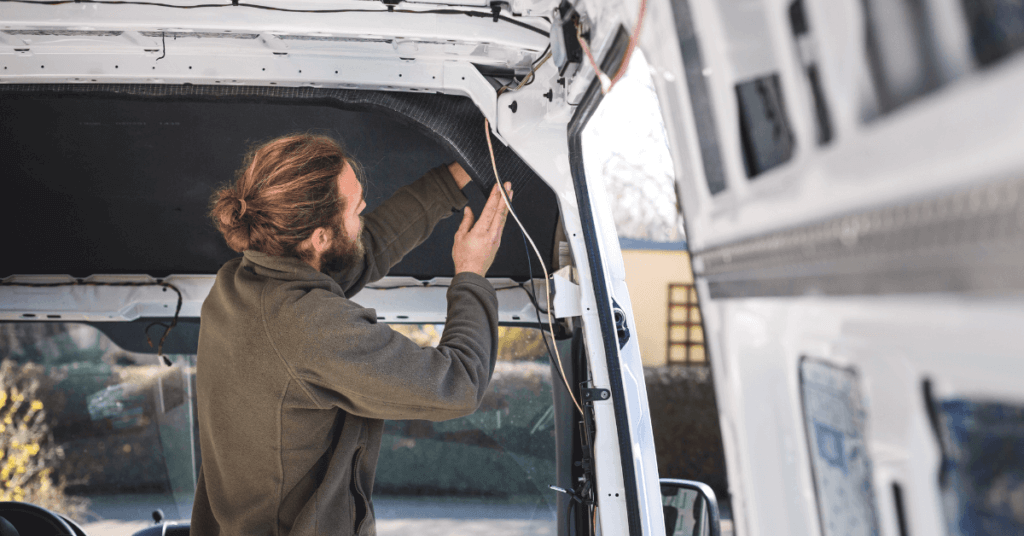
Insulating your van’s walls, ceiling, and floor is the first step in soundproofing. Materials like closed-cell foam, fiberglass, and mineral wool can help absorb sound and minimize noise transmission.
Soundproofing Mats
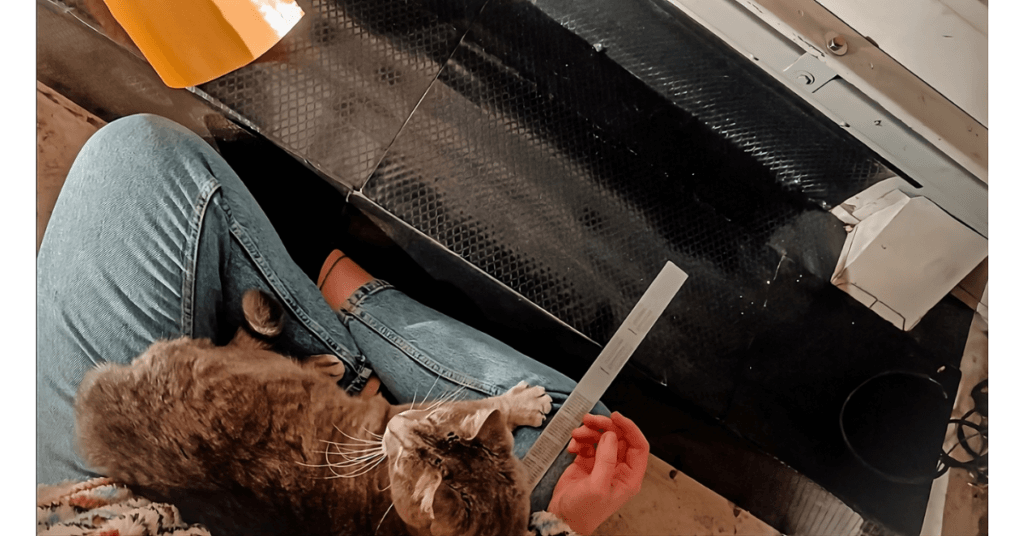
Soundproofing mats, or mass-loaded vinyl (MLV), can reduce airborne noise and vibrations in your van. These dense, flexible sheets can be applied to the interior surfaces of your van and will help block airborne noise and vibrations.
Acoustic Panels
Another effective method for sound deadening your van is installing acoustic panels. Place them in the walls and ceiling of your van to absorb sound and reduce reverberation in your vehicle.
Sealing Gaps
Sealing any gaps or cracks in your van’s windows, doors, and other openings is crucial to prevent sound from getting in or out. Make sure to create a seal by using weatherstripping, caulking, or foam tape.
Step-by-Step Guide
STEP 1 ︱ Remove Existing Interior
Remove any interior components from your van, such as panels, insulation, and flooring. You can skip this step if starting your van conversion from scratch.
STEP 2 ︱ Insulate
The next step is to install the insulation in your van’s walls, ceiling, and floor. Use a combination of the materials mentioned above to achieve optimal soundproofing.
STEP 3 ︱ Apply Soundproofing Mats
Cut soundproofing mats to size and apply them to the interior surfaces of your van. Make sure to cover as much area as possible for maximum effectiveness.
STEP 4 ︱ Install Acoustic Panels
Install acoustic panels on the walls and ceiling of your van. You can install these panels by using screws, but we recommend getting the self-adhesive panels for a more straightforward application.

Remember to clean the surface before applying the panels for optimal adhesion.
STEP 5︱ Seal Gaps
Ensure the effort from the previous steps doesn’t go to waste, and seal all the gaps or cracks in your van’s windows, doors, and other openings. You can do this by using weather stripping, caulking, or foam tape.
STEP 6 ︱ Reinstall Interior
Congratulations! The soundproofing of your van is complete. You can reinstall your camper’s interior, such as panels, thermal insulation, flooring, and furniture.
Now that you have successfully soundproofed your van, it’s time to enjoy the peace and quiet you created in your mobile living space!
Hope to see you on the road,
Planet Doe
![]()
WANT TO MAKE VANLIFE EXTRA COZY? Check Out 6 Pro Tips For A Cozy Outdoor Escape!